A Look Into Carving Limestone
What Makes Limestone Good for Carving?
Limestone originates in the ocean, and is composed mostly of calcium carbonate. Calcium carbonate appears chalky and powdery, and gives limestone its malleable qualities. Because limestone is such a soft yet durable stone, it’s ideal for carving!
The Carving Process
Limestone is soft enough that it’s relatively easy to carve. If you’ve stumbled upon a loose piece of limestone or are learning how to carve, the methods below for limestone design may help! Additionally, these steps are great for learning about how, on a very small scale, Impression carves our very own stone!
Wet the Stone
Limestone is formed in water, and wetting it makes it more malleable. It may be more prone to breakage, which is good for carving but can be detrimental to the overall shape. Check for cracks in your stone prior to wetting it, as those cracks indicate where pieces could break off when wet or being carved.
Follow Natural Direction
Generally speaking, pieces of limestone always have indicators of the way it was formed. They can be seen in the natural bed lines, which give insight to the flow of water that once dictated the shape of your limestone. Be mindful of the natural bed lines that go across your unique piece of stone, as going against them creates extra stress. Try to design in such a way that your carvings follow the natural direction, or rotate your pre-determined design within the area of the stone until it matches the most lines.
Draw a Design
Create a design that speaks to you, and expresses your creativity. It is helpful to sketch out your design on paper first, and cut it out if necessary. Gently lay the paper on your rock, or sketch the design simply by looking at it. Pencil tends to work well as an indicator. Remember, your design is uniquely yours, so have fun with it! Going bold is always good on stone, because its brazenness is evened out by the simplicity of the stone material.
Use a Pitching Tool
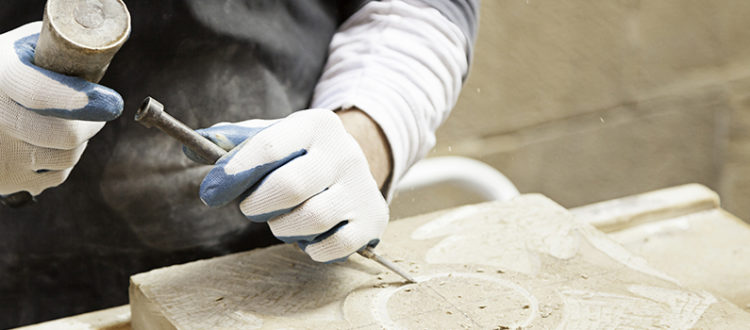
Pitching tools are used for removing unwanted stone. They define the overall shape of the stone piece, not the details. The tools are typically bevelled on one side, allowing them to be hit with a sideways movement. Holding your pitching tool about one-and-a-half inches from the stone’s edge, tilt the tool so it will break off the desired portion of stone. Using a hammer or mallet, hit the pitching tool while holding it steady. Repeat until all the unwanted stone is removed.
Define Shapes
Defining the intricacies of your design will take smaller tools. A point chisel can be held and hit with a hammer to create tinier shapes. By carving rows or other patterns, you can create ridges, grooves, and more. Mind the angle of your chisel, never forcing it too deep or at too steep an angle. Remember that carving is a slow process, and therefore requires patient movements that gently remove rock.
Smooth With Chisel
Once the shapes of your design are complete, a tooth chisel can be used to smooth out the designs you created. Again, mind the angle of the chisel, keeping the angle between chisel and stone from being too high or too low.
Smooth With Finishing Tools
After nearly completing your stone piece, finishing tools allow for details in texture. Smoothing out any sections of stone can be done with a piece of sandpaper or by a rasp. The soft nature of limestone makes it sensitive to sanding and smoothing, so apply the methods in small increments.
Professionals in Carving
Ready to make your own limestone carvings? It may sound simple, but Impression’s artisans have been studying and practicing stone carving for years to bring you the best custom home pieces possible. Check out all Impression has to offer, made with a slightly more complicated process than the hobby guide above!


